Collection of EVP[Exported for translation]
Comments:
- Ex works, the is bound irreversibly to one specific machine.
It can not be transferred to another machine. - Keep the installation file for machines with OKC 3 or OKC 5 control generation in order to be able to re-install the EVP if necessary.
No more necessary from OKC6 / EKC on. - Before changing the IPC, backup the state of the machine configuration of the machine that was the basis of the EVP generation for this machine.
- The machine will be re-configured when installing the EVP.
With it the pattern memory will be deleted as well.
Therefore, exit the production before the installation.
Check the date and the time
-
 Senior Operator
- 1
- Open the tab.
 Configuración de la máquina
 Ajustes de sistema
 Hora e idioma
 - 2
- Check date, time and the time zone.
Export Loggings
-
 Senior Operator
- 1
- Open the window.
 Realizar mantenimiento
 Servicio
 Archivo de registro
 - 2
- Select the save location for the Loggings.
 Select the save location, and confirm with .
 - 3
- Export Loggings.
 Exportar el archivo de registro (El actual programa de tisaje está incluido)
 - The "Datos exportados con éxito" message will appear.
- 4
- Send Loggings to STOLL Helpline and require an EVP Upgrade.
- 5
- The STOLL Helpline creates an EVP Upgrade.
The Helpline will inform you when it will be available for downloading.
Download the EVP
- 1
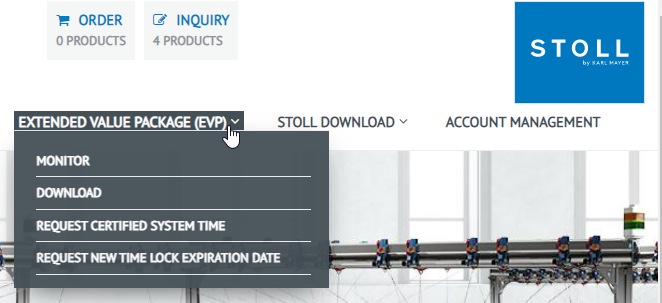
- Call up the following website:
http://evp.stoll.com/request_evp_download/index.html - 2
- Select the language.
- 3
- Enter the machine number.
- 4
- Save the "EVP_Download.zip" file on your computer.
- 5
- Extract the "EVP_Download.zip" file.
- The "Knitevp.zip" file will be generated.
- 6
- Copy this file to the USB memory stick.
Install the EVP
-
 Senior Operator
 -
Knitevp.zip is available:
The USB memory stick with the "Knitevp.zip" file is plugged.
- 1
- Open the tab.
 Configuración de la máquina
 Opciones
 EVP
EVP - 2
- Select folder with the desired EVP.
 Select drive and confirm with .
 - 3
- Start EVP import.
 Instalar EVP
- The "Los datos fueron importados con éxito." message will appear.
Check and correct the system time
- 1
- Open the tab.
 Configuración de la máquina
 Opciones
 EVP
EVP - 2
- The state of the system time is displayed.

The three states of the system time:
|
1 |
|
La hora del sistema es válida. |
|
Everything is all right, no remedy required. | ||
|
2 |
|
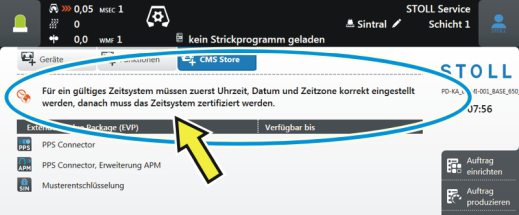
La hora del sistema no es válida. Configure correctamente hora, fecha y zona horaria. |
|
Remedy: Set correct system time of the EKC operating system.
|
|
3 |
|
La hora del sistema no es válida. Configure primeramente hora, fecha y zona horaria. Después solicite a STOLL un EVP de certificación horaria e impórtelo dentro de las siguientes 24 horas. |
|
Remedy: Require the time EVP at STOLL, and load it into the machine.
|
Concluding activities
- 1
- Make settings for Stitch Nameserver (SNS) or PPS, if necessary.
- The work is done.


