Needle Beds and their Elements
Construction: Needle beds
- The front needle bed is permanently screwed to the support of the needle beds.
- The rear needle bed can laterally be racked relative to the front needle bed by the racking device.
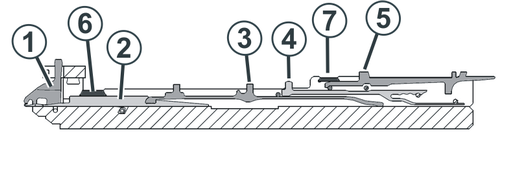
|
No. | Elements | No. | Elements |
|---|---|---|---|
1 | Holding-down jack | 5 | Selection jack |
2 | Needle | 6 | Needle bar |
3 | Coupling part | 7 | Cover rail |
4 | Intermediate slider |
|
|
The moveable parts (2) till (5) are fixed by multiple cover rails (6, 7) in the needle bed.
I. Replacing needle and coupling part
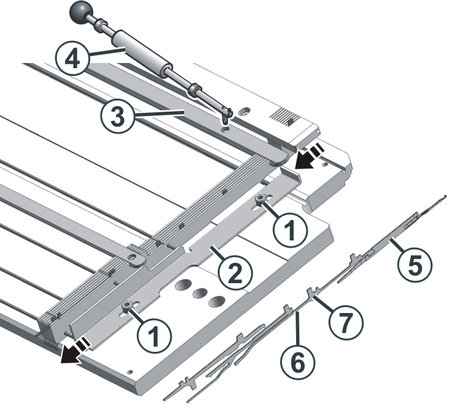
- 1
- Loosen both screws (1) and move the strip (2) downwards.
- 2
- Push the needle rail (3) to the side with the extraction hook (4), until the repair point is free.
- 3
- Pull the needle (5) and coupling part (6) upward.
- 4
- Press the coupling part downward, when the butt of the coupling parts (7) bumps into the holding-down jack bed.
- 5
- Assemble the new needle and coupling part.
- 6
- Push the butt of the coupling part into the needle bed under the jack bed.
- 7
- Push the needle rail (3) and the strip (2) into the home position.
II. Replacing intermediate slider
To replace the intermediate slider, you need a pair of pliers.
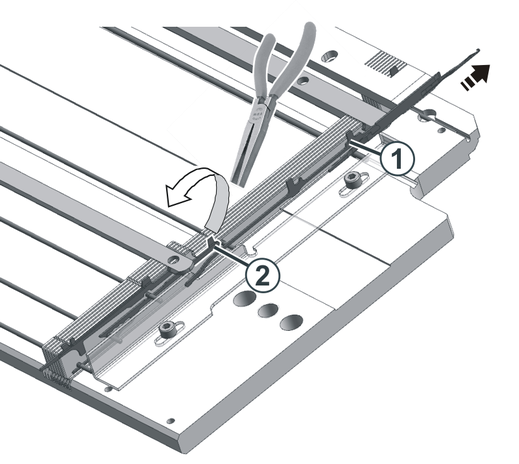
- 1
- Push the needle and coupling part (1) upward.
- 2
- Using the pliers, pull the butt of the intermediate slider (2) upwards out of the needle bed.
- 3
- Install the new intermediate slider in the reverse order.
- 4
- Push the needle and coupling parts into the home position.
III. Replacing selection jack
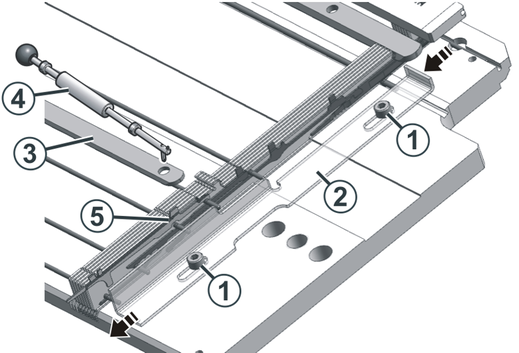
- 1
- Loosen both screws (1) and move the strip (2) downwards.
- 2
- Push the needle rail (3) to the side with the extraction hook (4), until the repair point is free.
- 3
- Replace the selection jack (5).
Make sure that you insert an identical selection jack (same position of the selection butt).
There are eight different selection jacks. The selection jacks differ in the position of the selection butt, note this when replacing the selection jack. 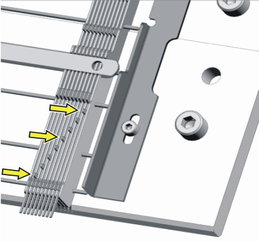
- 4
- Push the needle rail (3) and the strip (2) into the home position.