Checking protective devices
The protective devices must be checked at least once every 24 hours:
DANGER
Defective protective device!
Death or serious injury.
- If a protective device does not stop the machine, it must be stopped for safety reasons and secured against being started up again. Repair must be carried out immediately.
DANGER
Opened covers and safety doors!
Danger of crushing and cutting by the carriage, the autarkic yarn carriers, the racking and the fabric take-down (main take-down, auxiliary take-down, comb take-down, belt take-down)
- Do not reach into the running machine when the covers and safety doors are open.
|
Protective device | Checking |
|---|---|
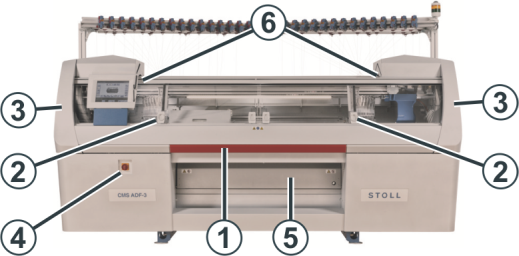
Engaging rod (1) | Production setting |
| |
Middle position | |
| |
Covers (2) |
|
Lateral safety doors (3) |
|
|
Protective device | Checking |
|---|---|
Main switch (4), emergency stop switch |
|
Machine with comb take-down: |
|
Condition: The carriage has stopped.
|
 key.
key. window and tap the
 |
Protective device | Checking |
|---|---|
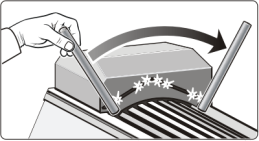
Light curtain (6) | Condition: The carriage has stopped. Check the light curtain with the test rod. The test rod is on the tray at the touch screen, see.
|
Condition: The carriage is moving.
|