Replace display (ADF)
Assembly with an ADF machine
|
| The cables are fastened with cable ties. To remove the cables, cut the cable ties. In the conversion kit you will find new cable ties. Fasten the new cables with it. |
1 | Stop carriage at the right reversing position. |
2 | Disconnect machine main switch. |
3 | Remove all four covers from the machine.
|
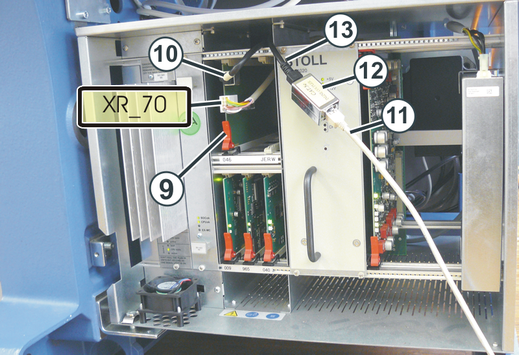
4 | Disconnect both cables from the display.
|

|
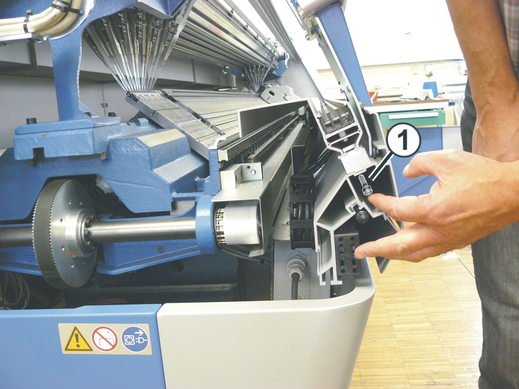
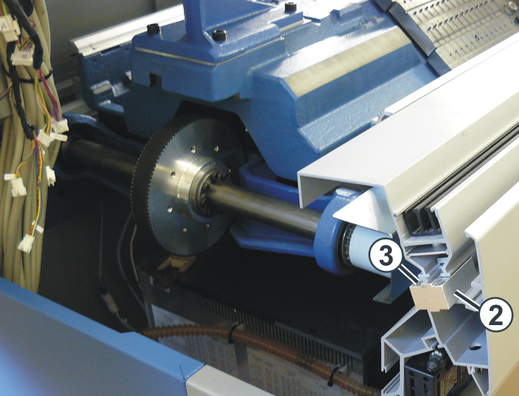
5 | Remove the screw (1) on the left and right side of the machine (hexagon socket 5mm).
Remove the slot-nut (2) on the left and right side of the machine.
|
|
6 | Remove the screw (hexagon socket 5mm). Remove cover (4) from the machine.
|
7 | Remove both screws (5) (hexagon socket 4mm). Remove cover (6) above the energy chain to be able to remove the cables more easily.
|


|
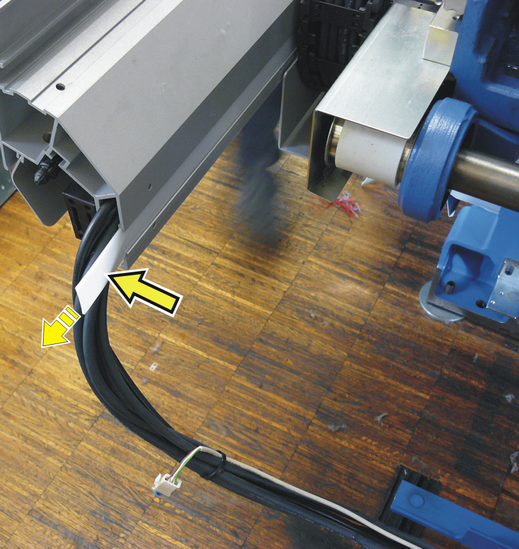
8 | Pull out cover strips, they are 3 in total.
|
|
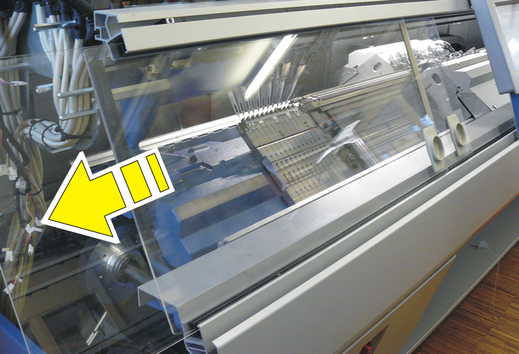
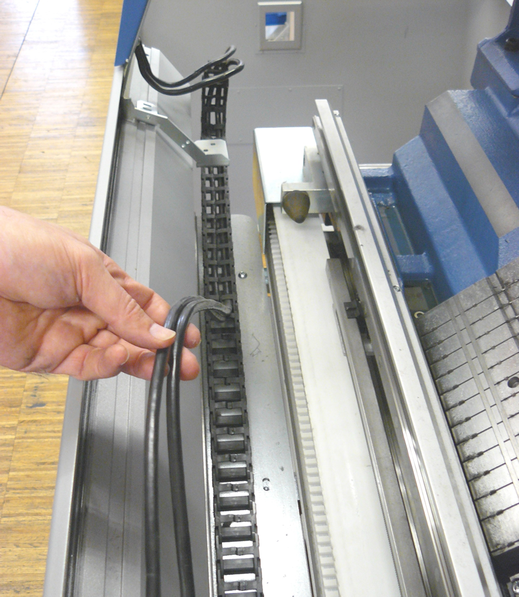
9 | Remove the cables out of the rail.
|
|
10 | Remove the stop point from the display (hexagon socket 3mm).
|
11 | Slide the display completely to the left. Remove both screws (7) from the cable guide (hexagon socket 4mm).
|

|
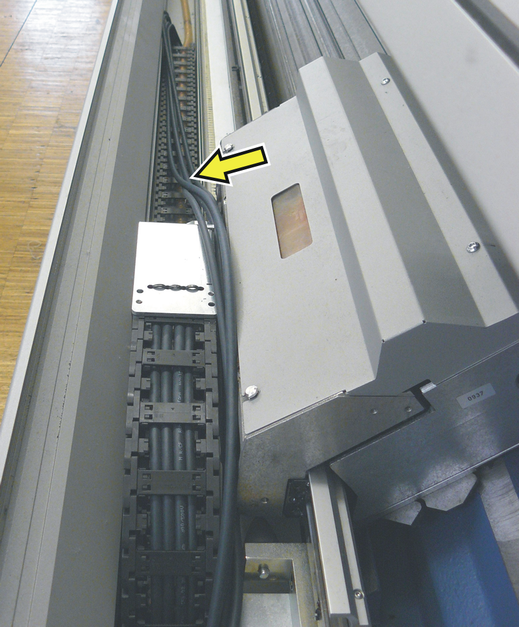
12 | Remove the cables from the energy chain.
|
|
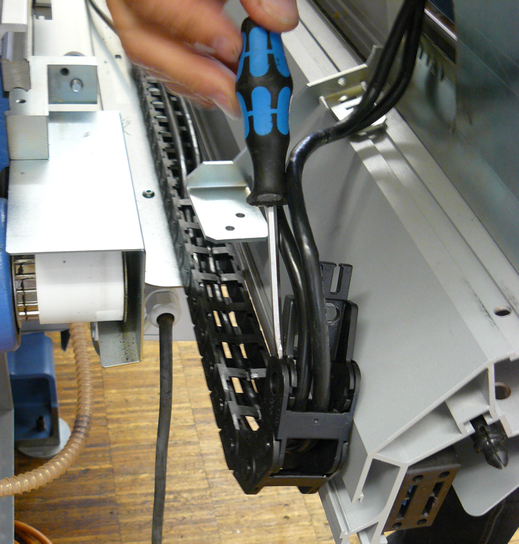
13 | Cautiously loosen the energy chain from the plunger to be able to remove the cables from the energy chain.
|
14 | Remove both cables from the display slider. Slide the display to the left and remove it from the machine. |
15 | Disconnect the cables from the control cabinet and remove them from the machine. |
|
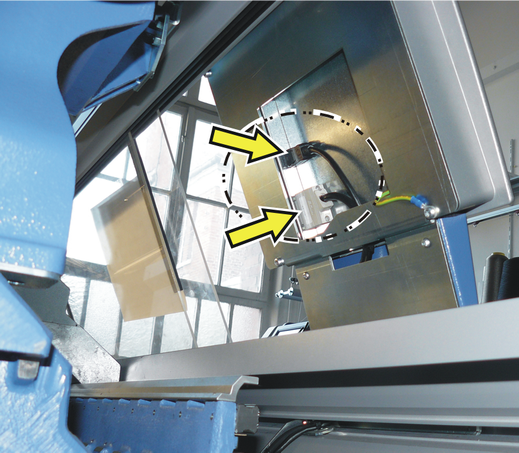
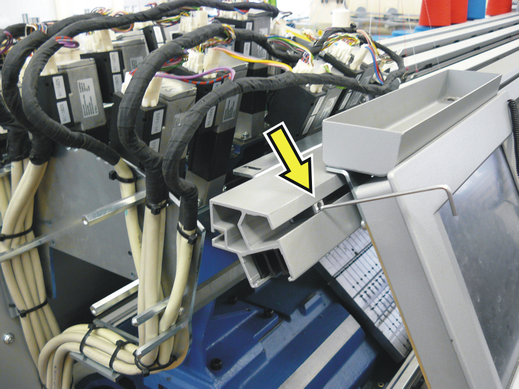
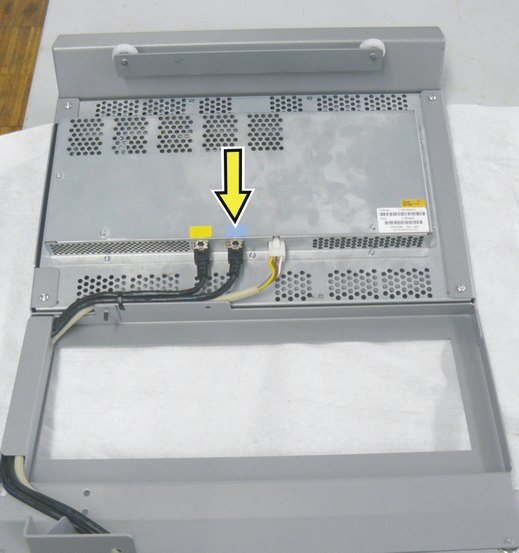
16 | Screw the new display onto the display slider. Connect the new cables, they are three in total. The blue cable is connected to the central socket (arrow).
|
|
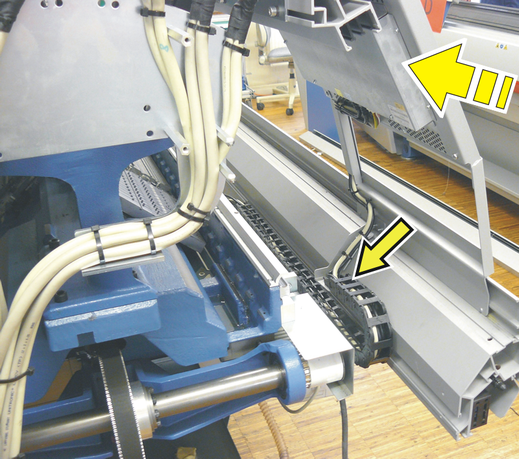
17 | Position the display slider on the machine. Lay the three cables into the energy chain and lead them to the right control cabinet
Connect the plunger and the energy chain (see step 13).
|
|
18 | Work on the right control cabinet:
|