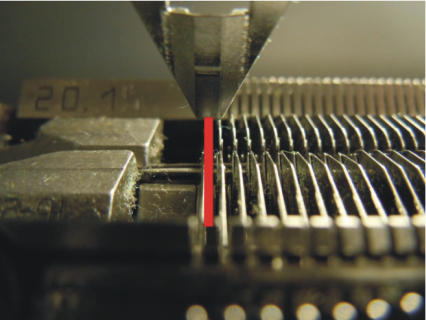
Horizontal adjustment of a yarn carrier
Adjust yarn carrier horizontally
This adjustment of the yarn carrier is machine related!!
Additional pattern related adjustments may be required.
- You are signed in as Senior Operator
 .
. - Knitting program is loaded.
- The production was started.
- 1
- In the main navigation bar select
 Maintain Machine.
 - 2
- Select
 Service in the bottom navigation bar.
 - 3
- Tap the
 Yarn carrier key button.
 - 4
- Select the
 Adjust Horizontally tab.
- The menu appears.

1 |
| Button Move to First Position in order to move the yarn carrier to the first position
The identification of the |
2 |
| Button Move to Last Position in order to move the yarn carrier to the last position |
3 | Buttons for positioning the yarn carrier | |
| Large step width for moving the yarn carrier to the left | |
| Small steps for moving the yarn carrier to the left | |
| Small steps for moving the yarn carrier to the right | |
| Large step width for moving the yarn carrier to the right | |
4 |
| Button for confirming the corrected position as Apply first position.
|
 : The selected yarn carrier regarding its home position is brought to the first needle in the needle bed.
 button and the button are greyed out:


- 1
- Select the yarn carriers to be adjusted.
- 2
- Press the Move to First Position button.
- The yarn carrier is located in the needle bed on the first position (first needle).
- Yarn carrier out of the left clamping and cutting device on first position at the left in the needle bed.
- Yarn carrier out of the right clamping and cutting device on first position at the right in the needle bed.
- 1
- With the help of the arrow keys move the yarn carriers until the yarn carrier tip is centered to the first needle.
- 2
- Tap on the
 Confirm first position button
- The setting is confirmed and the yarn carrier is adjusted.
- The yarn carrier automatically runs into its starting position.