Clean additional needle bed thoroughly (CMS 730 T)


|
|
Stolltex T46 |
E3│E3,5│E4│E5│E7│E8│E2,5.2│E3,5.2│E5.2│ |
|
Stolltex T32 |
E16│E18│E20│E8.2│E9.2│E10.2 |
The additional needle bed is cleaned daily by the operator. In addition, it must be cleaned thoroughly every 12 to 26 weeks.
Insertion regulation for transfer parts
On the left machine side, knitting begins at the bottom in the rear and front additional needle bed with 1 inch transfer parts with a selection butt, then 1 inch top transfer parts etc.
Thorough clean of the additional needle bed:
- 1
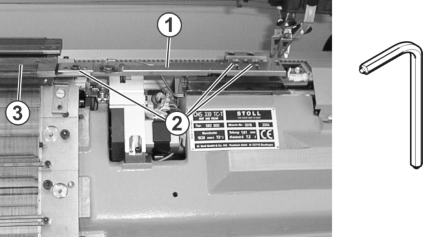
- Remove screws (2) on the left and right-hand sides of needle bed. Use the special hexagon screwdriver from the accessories for this purpose.
- 2
- Remove linking of additional beds (1) on both sides of machine by loosening screws.
- 3
- Move additional needle beds (3) approx. 10 cm to side and remove upward.
- 4
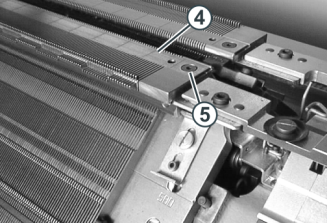
- Remove the screw (5).
- 5
- Remove the cover rail (4) with the extraction hook.
- 6
- Remove transfer parts.
- 7
- Push dirt out of the needle with the groove cleaner.
- 8
- Blow out the additional needle bed with compressed air.
- 9
- Clean the transfer parts with oil or diesel fuel.
- 10
- Insert the transfer parts in the right inch progression (see insertion regulations for transfer parts).
- 11
- Place transfer parts in the home position (rear position).
- 12
- Guide in the cover rail.
- 13
- Tighten the screw (5).
- 14
- Mount the additional needle bed.
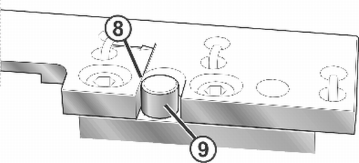
- 15
- When mounting the connection, make sure that the stop edge (8) contacts the bolt (9).