ADF Light Curtain for Ultra-coarse Yarns
危险

保护装置损坏!
死亡或重伤。
- 如果安全保护装置没有触发自停,出于安全考虑就必须停止机器并确保不会重新启动。必须马上进行维修。
|
ID |
Designation |
Quantity |
|---|---|---|
|
4170278408 |
FF-JOCH-LI. |
1 |
|
4170278409 |
FF-JOCH-RE. |
1 |
|
4170244268 |
AUFKLEBER-ISO KAMMABDECKUNG |
2 |
|
4170225099 |
Slot nut |
2 |
|
4170278875 |
Operating Instructions Conversion Light CurtainADF |
1 |
|
4170022658 |
Cap screw ISO4762-M6X14-A2A |
2 |
|
4170022431 |
Washer ISO7089-6-200HV-A2A |
2 |
|
4170020351 |
Hexagon screw ISO4017-M5X10 |
2 |
|
4170259666 |
Washer ISO7089-5-200HV-A2A |
2 |
|
4170008379 |
Cable tie 140X3,6 |
8 |
Dismantle the light curtain:
- Switch off main switch.
- Perform the following steps on both sides of the machine.
- 1
- Open the covers and push all the yarn carriers of the corresponding rail to their outmost position.
Push the yarn carrier on the front to the left.
Push the yarn carrier on the rear to the right. - 2
- Dismantle the cover of the light curtain.
Remove the screws under the profile rail.
Remove the screws at the rear of the cover.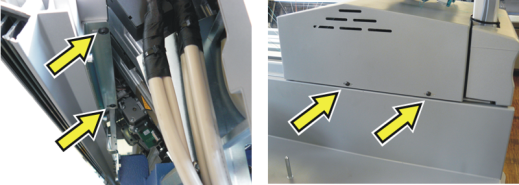
- 3
- Mark the position of the supports before dismantling the light curtain.
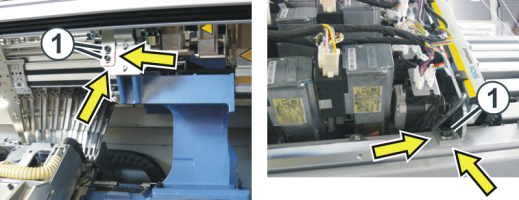
In order to be able to assemble them at the same position. - The markings make the assembly easier.
- 4
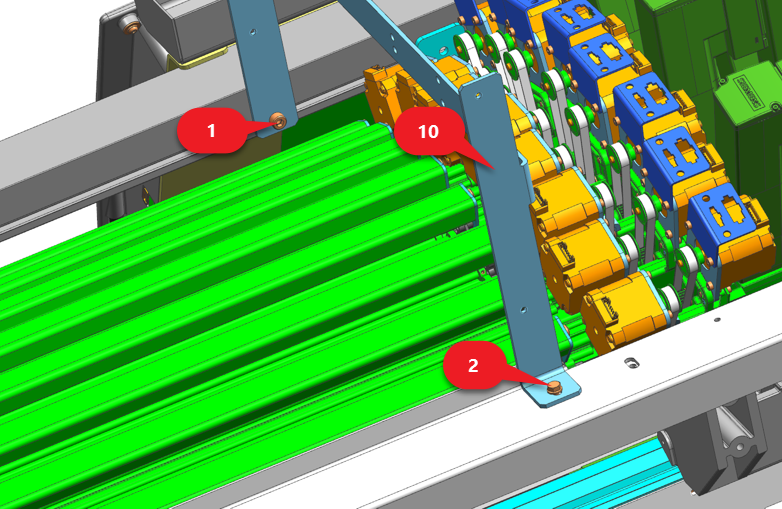
- Remove the screws (1).
- 5
- Place the light curtain carefully to the rear on the sliding board.
Mount the light curtain upright:
- 1
- Mark the position of support (5).
In order to be able to remount the supports at the same position. - 2
- Loosen both screws (6).
Push the support outward and remove it from the machine.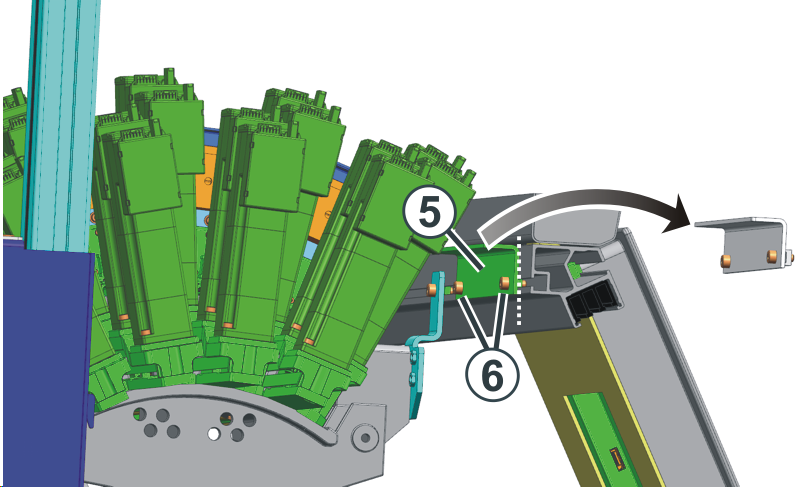
- 3
- Remove the screw (7).
Keep the slot nut (8) in its groove and push it to the center of the machine.
Screw the screw (7) back into the slot nut.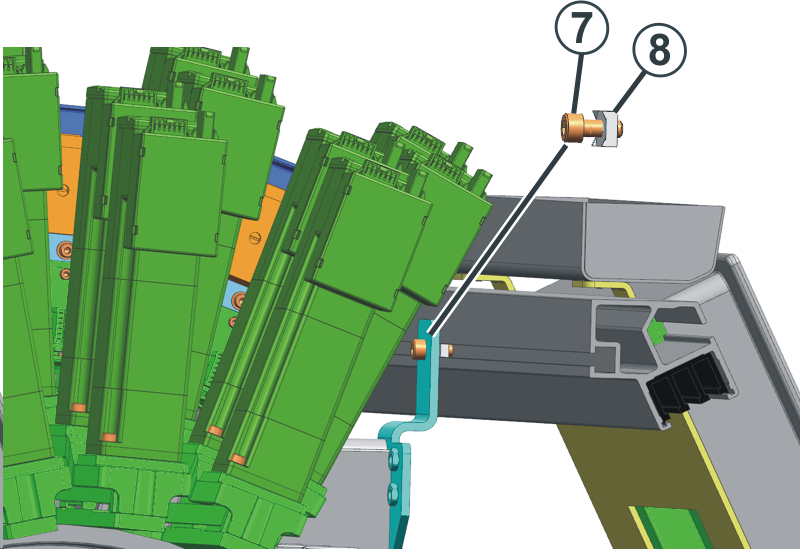
- 4
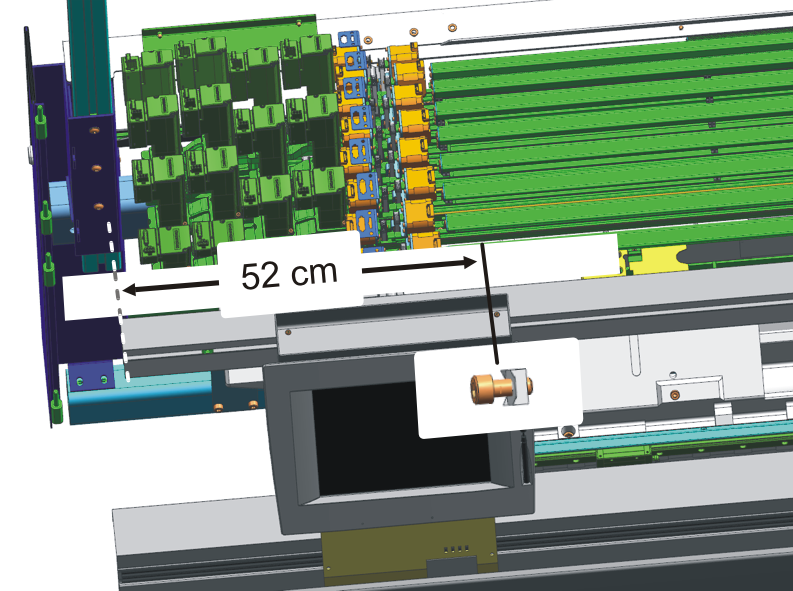
- Push the screw (7) until the distance to the right side of the machine is 52 cm.
- 5
- Put the screw with the slot nut (9) in its groove and push it to the center of the machine.
Push the front profile rail (10) slightly forward so that the screw can be pushed past the support (11).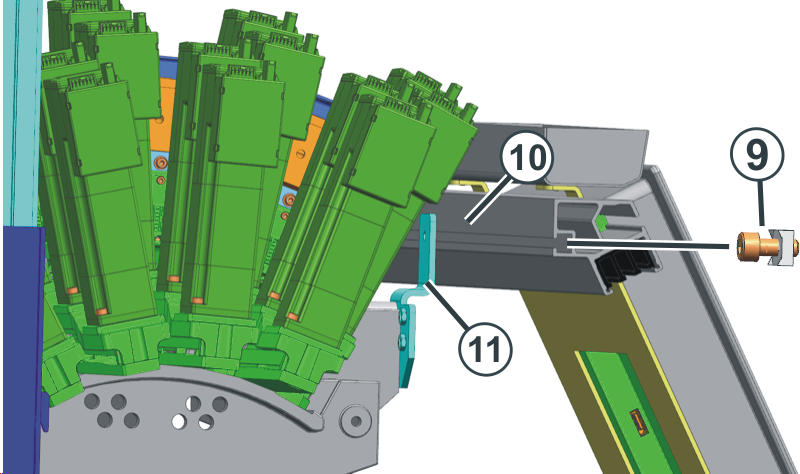
- 6
- Push the screw (9) until the distance to the left side of the machine is 52 cm.
- 7
- Put the screw with the slot nut (12) in its groove and fasten the support (11).
- 8
- Put the support (5) in the groove and fasten it at the marking.

- 9
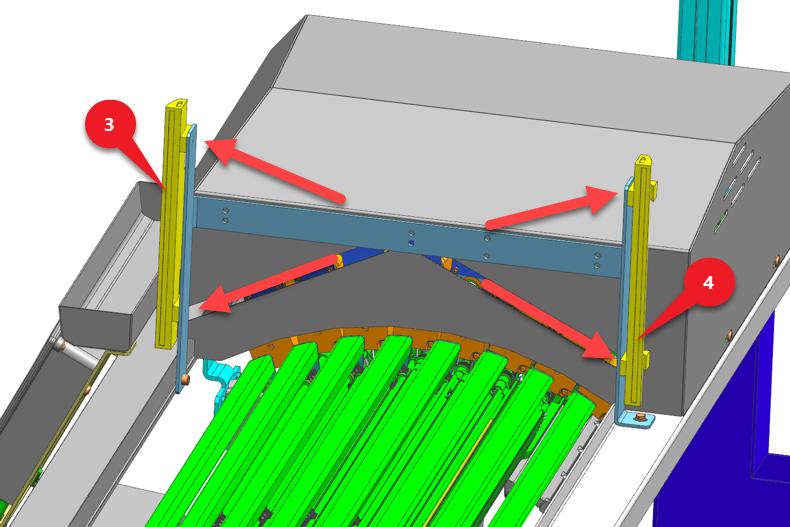
- Align the left and right yoke
- 10
- Mark the boring at the rear profile (2).
- 11
- Drill two holes (9mm) into the rear profile (2).
- 12
- Fasten the left yoke (10) and the right yoke at front (1) and rear (2).
- 13
- Mount the elements of the light barrier (3+4) vertically at the yoke.
- 14
- Mount the covers of the light curtain.
Start the automatic check on OKC:
Both the elements at the left and right hand side of the machine must be aligned exactly to each other.
- All covers are closed.
- 1
- Call up the menu from the .
- 2
- Call up from window .
- 3
- Tap on the key.
- The check starts (duration: one to two minutes).
- 4
- The light curtain signalizes the alignment quality by the blue LEDs (1 to 5).
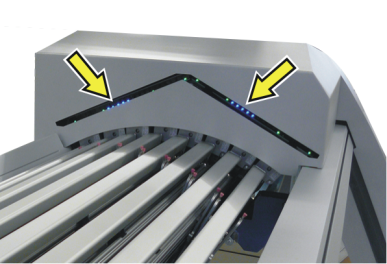
- If all 5 LEDs are glowing, the alignment is optimal.
- If 3 LEDs are glowing, the alignment is sufficient.
- If no LED is glowing the alignment is bad.
-> Re-align the light curtain!
- 5
- When the check is completed successfully, the LEDs will go out.
No message appears at the touch screen.
启动自动检查在 EKC:
位于机器左右两侧的部件必须准确对齐。
- 保护罩关闭。
- 1
-
 维修
机器 ->
维修
机器 ->  检修 ->
检修 ->  光幕
光幕 - 测试光幕 出现.
- 2
- 点击
 Restart Light Curtain
键。
Restart Light Curtain
键。 - 出现提示信息光幕:
要开始自动测试? (大约需要 1-2 分钟) 出现. - 3
- 点击 是 确认提示。
- 蓝色LED灯指示光幕的对位质量(1到5)。
- 如果5个LED灯全亮,说明对位最佳。
- 如果亮3个LED指示灯,表示对位情况尚可。
- 如果没有指示灯亮起,说明对位状态差。
-> 重新对准光幕!

当检查顺利完成后,LED指示灯会亮。
触摸屏上再无信息出现。
Check the light curtain with the test rod at standstill:
- The carriage has stopped.
- 1
- Hold the test rod so that it is at a right angle to the protective area.
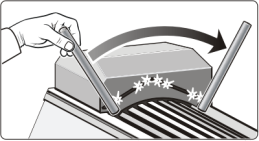
- 2
- On the left side of the yarn carrier rails move the test rod slowly from the front to the back.
- During the time, the test rod interrupts the protective area:
- the green LEDs may not glow.
- the red LEDs must glow always.
- 3
- To confirm the error message, tap the following button:

- 4
- Repeat this procedure in the machine center and on the right side.
Check the light curtain with the test rod in motion:
- The carriage is moving.
- 1
- On the left side of the yarn carrier rails move the test rod into the protective area.
- The carriage must stop immediately.
- 2
- To confirm the error message, tap the following button:
- 3
- Repeat this procedure in the machine center and on the right side.