Direct Installation: Installation and Configuration
Perform installation and configuration:
- 1
- While the Warmstart is running, press one of the buttons, for ex. under Installation path (1) to specify the source directory for the software installation.
- The automatic warm start will be canceled.
- 2
- Under (1) select one of the 3 presettings.
- 3
- If necessary, change the path of the source directory via the corresponding button.
- 4
- Select the desired installation:
-
Installation:
Without the possibility of changing the Machine parameters. -
Installation and Configuration:
With the possibility of changing the Machine parameters.
Result:
A message with the version to be installed is displayed.
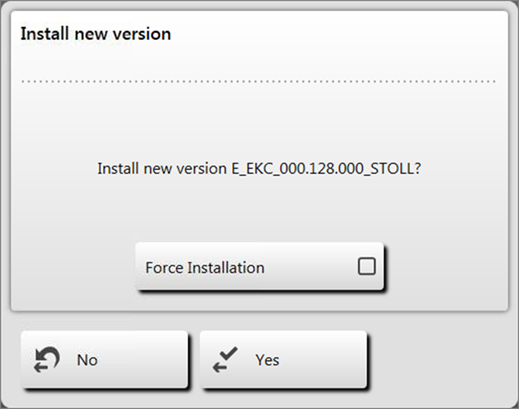
- 5
-
Force Installation
 :
:
Install the operating system completely new or repair it.
Not recommended!! (takes a long time)
- or -
Force Installation :
:
Quickly install the changed data.
If the language file eknitlang is in the same directory as the operating system, this file is installed automatically.
Can also be installed afterwards.
- 6
- To confirm tap the
 Yes button.
- The installation process gets started.
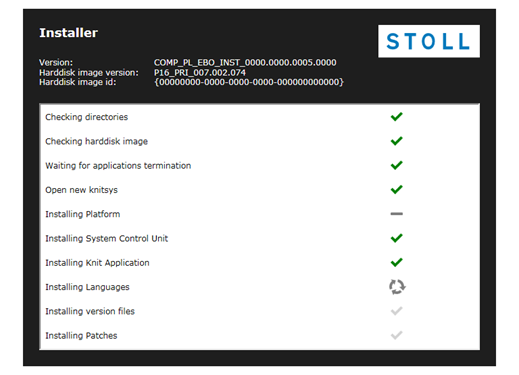
- The menu is automatically closed and the next menu is displayed.

- 7
- According to the machine gauge the Knit and wear machine button
- Activated
 : with gauges of multi gauge and knit&wear machines
 - Disabled
 : with 'normal' gauges of the machine
- 8
- Activate the Knit and wear machine button.
- 9
- Go to the next setting with the Continue
 button.
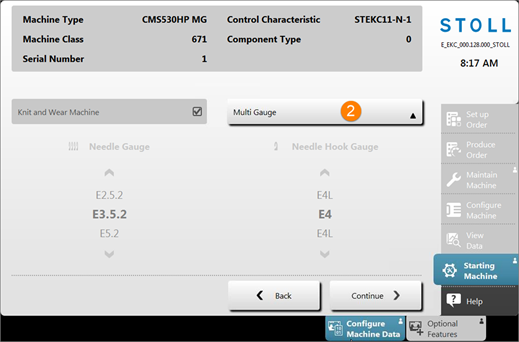
- 10
- With the (2) button select the following:
- Multi Gauge
- Knit&Wear
The selection only is possible if the Knit and wear machine button was activated.
- 11
- Go to the next setting with the Continue button.
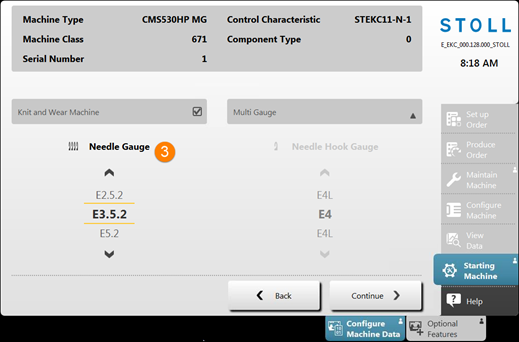
- 12
- With
 or
or  select the desired
  .
. - 13
- Go to the next setting with the Continue button.
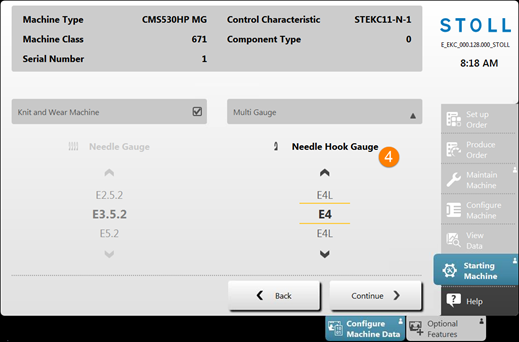
- 14
- With or select the desired
 .
. - 15
- Go to the next menu with the Continue button.
|
|
Feed Wheel on the Left Present |
|
|
|
Feed Wheel on the Right Present |
|
|
|
Quantity of Clamping and Cutting Points on the Left | |
|
Quantity of Clamping and Cutting Points on the Right | ||
|
|
Auxiliary Take-down |
|
|
|
Belt Take-down |
|
|
|
Central Lubrication |
|
|
|
Suction |
|
|
|
Yarn Carrier Drive |
|


- 16
- Via the respective buttons enter the corresponding machine configuration.
Machine fault!
The presence or lack of machine options must correctly be specified, as otherwise a fault may occur on the machine.
- 17
- Go to the next menu with the Continue button.
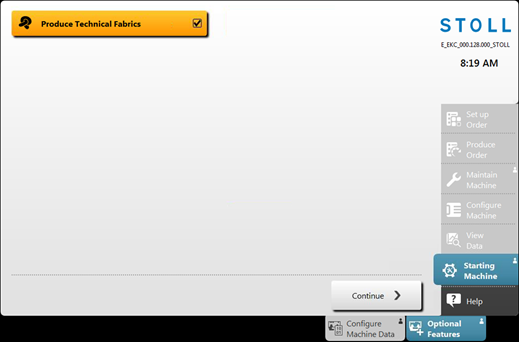
- 18
- Make the desired setting with the
 Produce Technical Fabrics button:
- Activated : The functions for technical fabrics are enabled
- Disabled : The functions for technical fabrics are not enabled
- 19
- Go to the next menu with the Continue button.
- The menu is opened.
- 20
- More in the next chapter Reference runs.