Вдяване на autarkic нишководач[Outdated translation - Switch to English or German]
Autarkic нишководач:
|
ADF - нишководач |
Функция |
|---|---|
|
|
Нишководачите се движат напълно независимо в хоризонтална и вертикална посока |
Разпределение по релсите при 32 autarkic нишководача:
- Нишководачи на релси от 1-4, върховете на нишководачите са затворени отпред и отворени в задната част
- Нишководачи на релси от 5-8, върховете на нишководачите са отворени в предната част за вдяване и затворени отзад
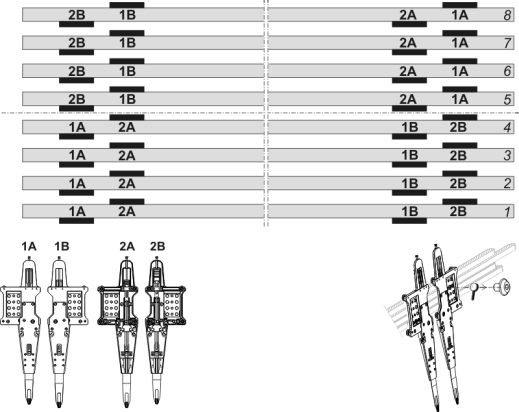
Два различни конструкционни типа:
- Нишководач 1A отговаря на нишководач 2B
- Нишководач 1B отговаря на нишководач 2A
Специален нишководач за ADF Weave-in машини:
|
Нишководачи |
Вдяване |
|---|---|
|
|
Заобиколен път: Преждата няма да се вдява през тръбата за вдяване ,но ще бъде водена от двете странични допълнителни окца.
|
|
| |
|
Използване на нишководач със заобиколен път |
Обяснение |
|
Преждата е прекалено дебела, и не може да бъде вдяната през тръбата на нишководача |
|
След обръщане на посоката на шейната, преждата се издърпва(опъва) обратно от компенсатора на устройството за контрол,така че да не се формира балон. Образуването на балон води до дефекти в плетивото(дупки,изпуснати бримки,скъсана прежда и пр.) |
- 1
- Open the covers.
- 2
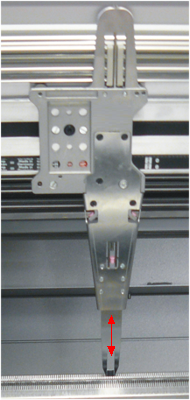
- Move the yarn carrier to a position where it can be threaded-up easily.
Outside of the knitting area e.g. - 3
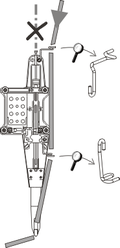
- Thread-up the yarn carrier.
Use the threading aid (1) for it. The threading aid is included in the accessories.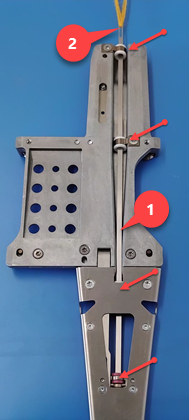
- 4
- Push the threading aid downward through the eyelets.
- 5
- Form a thread loop (of about 1 ft) through the eyelet of the threading aid (2).
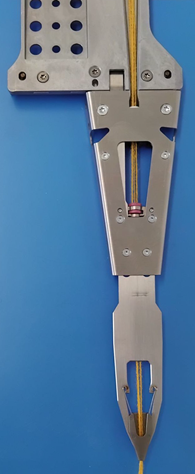
- 6
- Pull the threading aid down out of the eyelets.
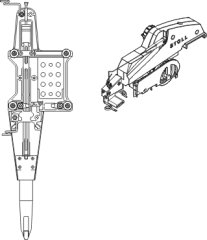
- 7
- Unthread the threading aid and thread-up the yarn manually into the clip tip.
- 8
- Hold the yarn end.
ОПАСНОСТ

The yarn carrier returns to its knitting or clamping position!
Danger of crushing and cutting by yarn carrier movement.
- Yarn carriers that have been moved manually will automatically return to their previous position when the engagement rod is pulled.
- Do not reach in the area of the yarn carriers.
- Pull the engaging rod upward to the reduced speed only.
- 9
- Carefully pull the engaging rod upward.
- The yarn carriers return automatically to their knitting or clamping position.
- If the yarn carriers are in their knitting position, the carriage starts moving and inserts the thread in the needles.
- 10
- When the thread is inserted securely in the needles, release the engaging rod.
- The carriage stops.
- 11
- Release the yarn end and close the covers.
- 12
- Keep moving the carriage until the reversing position is reached and stop it.
- 13
- Remove the yarn end.
- 14
- Continue the production or begin a new fabric.