Enhebrar guiahilos autárquico[Outdated translation - Switch to English or German]
Guiahilos autárquico:
|
ADF - Guiahilos |
Función |
|---|---|
|
|
Los guiahilos son movidos horizontal y verticalmente en forma autárquica |
Ocupación de carriles con 32 guiahilos autárquicos:
- En los guiahilos de los carriles 1-4 las boquillas de guiahilos están cerrados delante y abiertas atrás para enhebrar
- En los guiahilos de los carriles 5-8 las boquillas de guiahilos están abiertas delante para enhebrar y cerradas atrás
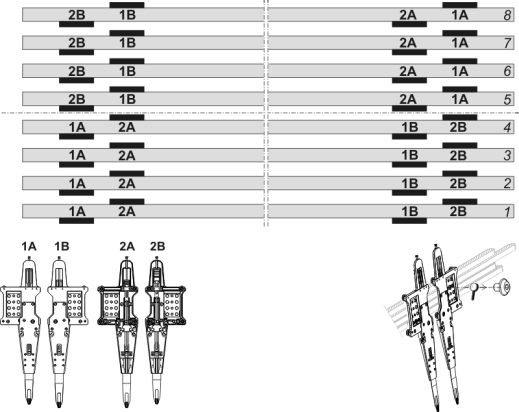
Dos modelos diferentes:
- El guiahilos 1A equivale al guiahilos 2B
- El guiahilos 1B equivale al guiahilos 2A
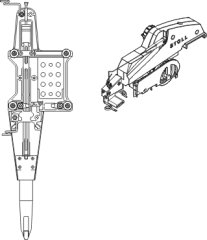
Guiahilos especial con máquinas ADF Weave in
|
Guiahilos |
Enhebrar |
|---|---|
|
|
Bypass: El hilo no es enhebrado en el tubo de hilo sino guiado a través de dos ojetes.
|
|
| |
|
Utilización del guiahilos con bypass |
Explicación |
|
El hilo es demasiado grueso y no se puede enhebrar en el tubito de hilo. |
|
Después del reenvío del carro, el brazo tensor de la unidad de control del hilo debe ir a buscar el hilo (tensar) para evitar la formación de un bucle de hilo. Un bucle de hilo que lleva a un error en el tejido (bucle de hilo, agujero, malla caída, rotura del hilo)resulta de la fricción fuerte. |
- 1
- Open the covers.
- 2
- Move the yarn carrier to a position where it can be threaded-up easily.
Outside of the knitting area e.g. - 3
- Thread-up the yarn carrier.
Use the threading aid (1) for it. The threading aid is included in the accessories.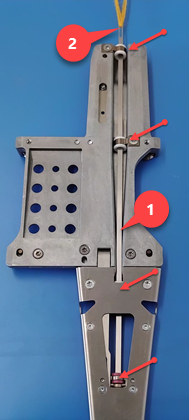
- 4
- Push the threading aid downward through the eyelets.
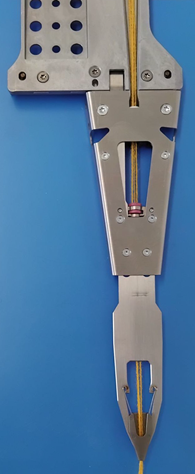
- 5
- Form a thread loop (of about 1 ft) through the eyelet of the threading aid (2).
- 6
- Pull the threading aid down out of the eyelets.
- 7
- Unthread the threading aid and thread-up the yarn manually into the clip tip.
- 8
- Hold the yarn end.
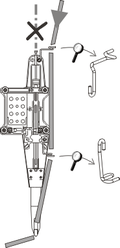
PELIGRO

El guiahilos vuelve a su posición de tisaje!
Peligro de pinzamiento y de cizallamiento por los guiahilos autárquicos.
- Los guiahilos que fueron desplazados vuelven automáticamente a su posición de tisaje.
- No meta la mano en el sector de los guiahilos.
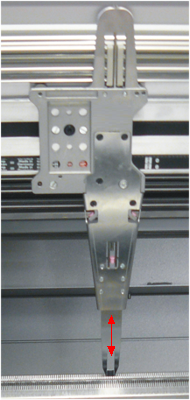
- Cuidadosamente tirar solo un poquito de la barra de arranque hacia arriba.
- 9
- Carefully pull the engaging rod upward.
- The yarn carriers return automatically to their knitting or clamping position.
- If the yarn carriers are in their knitting position, the carriage starts moving and inserts the thread in the needles.
- 10
- When the thread is inserted securely in the needles, release the engaging rod.
- The carriage stops.
- 11
- Release the yarn end and close the covers.
- 12
- Keep moving the carriage until the reversing position is reached and stop it.
- 13
- Remove the yarn end.
- 14
- Continue the production or begin a new fabric.