Pattern design technique on the CREATE PLUS
Create FlexPly Pattern
-
CREATE PLUS version V2.4. – 04/2023
or higher.
- ADF machine E 7.2 with cam box conversion for FlexPly
- 1
- Open a new pattern.
- 2
- Select an ADF machine E 7.2 with cam box conversion for FlexPly.
- 3
- Open the 기계 속성 tab.
- 4
- Select FlexPly setting in the 시스템 기능 section under 시스템 변환.
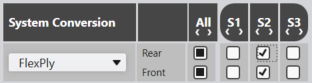
- In the 시스템 기능 section, the system functions are automatically adjusted.
- 5
- Confirm the prompt with OK.
The system conversion for 'FlexPly' will be activated!
- 6
- Open the 이중우수 색상 tool window.
 이중우수 색상
- 7
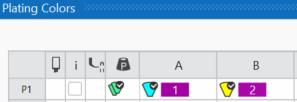
- Define a plating color by 우수 칼라.
Plating Color P1:
Column A: Yarn carrier color 8 for the binding thread
Column B: Yarn carrier color 7 for the motif thread
- 8
- Allocate the necessary plating index to the yarn carrier colors.
- 9
- Draw pattern.
The FlexPly motif can be done on the rear, front or on both needle beds.
Draw with plating color and the following needle action e.g:
Enter  뒤 코 only.
- Resulting "Stitch-Float"

- 10
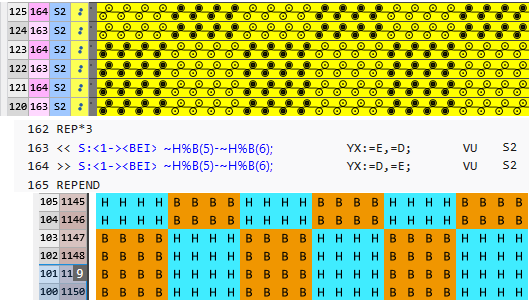
- Or enter
 Motif Thread at Rear and 뒤 코.
- Resulting "Stitch-Stitch"
 for motif thread and binding thread.
 - E.g. for the rear needle bed:
- 11
- Entry the FlexPly front and rear function in the
 시스템 기능 control column.
- 12
- Execute
 테크니컬
처리.
테크니컬
처리.
- 13
- Check the knitting program with the Sintral 검사 Check.
Recommended for FlexPly:
- Use yarn carriers of inner yarn carrier tracks.
Example for ADF 32: - Yarn carrier 8 for the binding thread
- Yarn carrier 7 for the motif thread
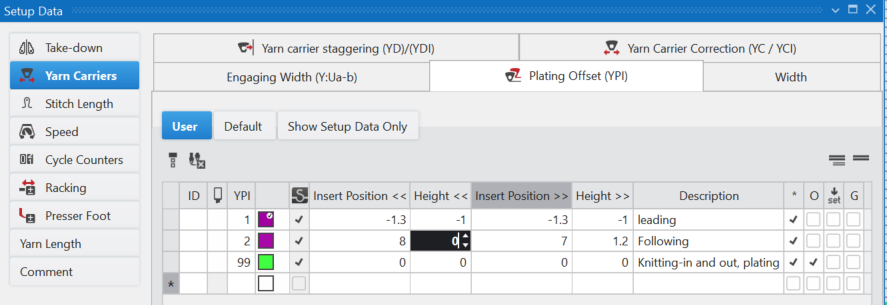
- Set the plating index (YPI) in the Setup Editor.
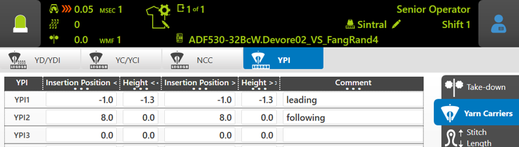
- Leading (binding thread)
Insert Position: -6.5
Height : 0 - Following (motif thread)
Insert Position: 6.5
Height : 0
- Floating length
Not more than 1/2 inch