Positioning the Needle Bed Upright
With machines with auxiliary take-down or belt take-down it can happen that yarns are winded around the respective take-down rollers.
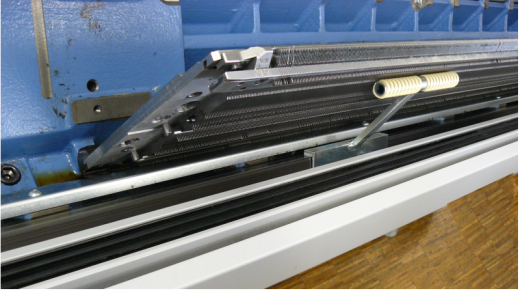
For removing the yarns the needle beds can be positioned upright.
Prepare Machine
- Before positioning the needles beds upright, the fabric is to be removed from the needles.
- 1
- Stop the carriage assembly into the left reversing position.
- 2
- In the main navigation bar select the main area
 Set up Order.
- or -
Select Maintain Machine.
 - 3
- Select
 Intervir
à mão II in the bottom navigation bar.
 - 4
- Press the
 Release drive brake [>!] button.
 - 5
- Push the carriage assembly to the left up to the stop point.
Positioning the Needle Bed Upright
- 1
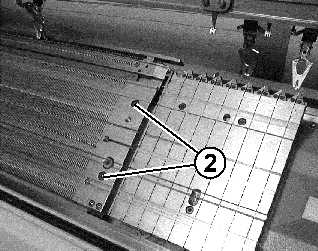
- Remove two screws (2) on each side of the machine.

- 2
- Lift the front needle bed carefully, tilt it to the front and lean it against the machine cover.

Cleaning the auxiliary take-down rollers
- 1
- In the main navigation bar select the main area
 Set up Order.
- or -
Select Maintain Machine.
 - 2
- Tap on
 Intervene Manually II in the bottom navigation bar.
 - 3
- Tap the
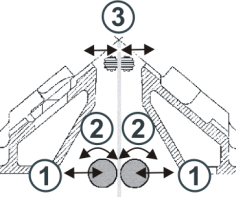
 Open auxiliary take-down [W+0] button.
- The take-down rollers (3) are moved apart.
- The button changes automatically to
 Close Auxiliary Take-down [W+1].
- 4
- Free the take-down rollers from the threads.
- 5
- With the
 Close auxiliary take-down [W+1] button close the auxiliary take-down again.
Perigo: Danificação dos rolos de estirador.
Para remover os fios não utilizar objetos pontiagudos ou afiados!
Returning the needle beds
- 1
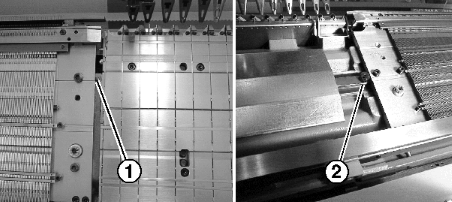
- Reassemble the needle bed in the reverse order. When doing so, make sure that the front needle bed contacts the pin (1) and the rear needle bed contacts the roller (2).

- 2
- Screw the needle bed again onto each machine side.