Assembling and adjusting the weave-in device
Operations at a glance
|
1 |
Assemble weave-in device, see |
|
2 |
Adjust the presser foot horizontally, see |
|
3 |
Adjust the presser foot vertically, see |
|
4 |
Setting measurements for the presser foot, see |
|
5 |
Final check of the settings, see |
Assemble weave-in device
For doing this, proceed as follows:
- The carriage must be located in the needle bed. This way, a damage of the weave-in devices is avoided by the clamping and cutting bed.
- 1
- Start machine with the engaging rod and stop again when the carriage is located in the needle bed.
- 2
- Assemble the corresponding weave-in device.
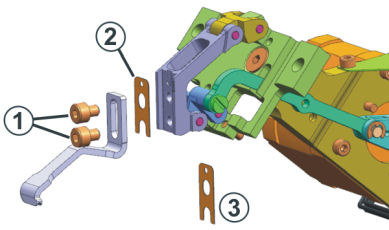
- 3
- Place the weave-in device on the support. Tighten the screws (1) only slightly as the weave-in device must still be adjusted exactly.
When you assemble a new presser foot type on the machine, you have to register it on the knitting machine, see Configure and enter the presser feet type.
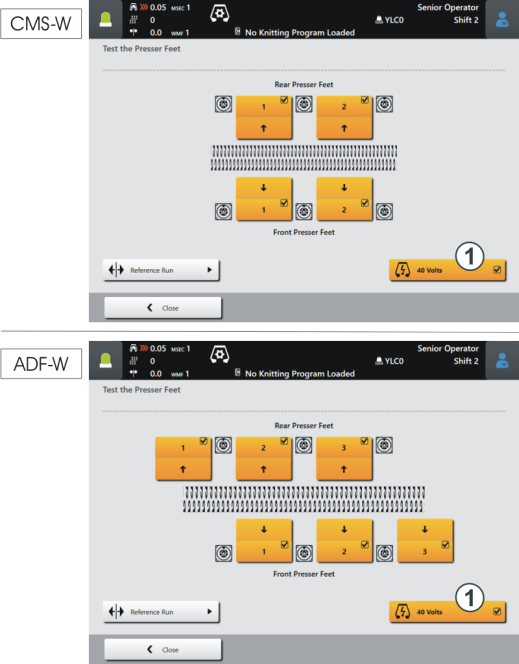
Adjust the presser foot horizontally
For doing this, proceed as follows:
- You are signed in as .
- 1
- Open the Presser Feet menu.
 Maintain Machine ->
  Service ->
  Presser Feet
 - 2
- Switch power supply 40 Volts off (1).
- The motors of the presser feet are currentless - You can move the presser foot manually.
- 3
- Move the presser foot manually to the undermost position.
- The presser foot is located between the needle beds.
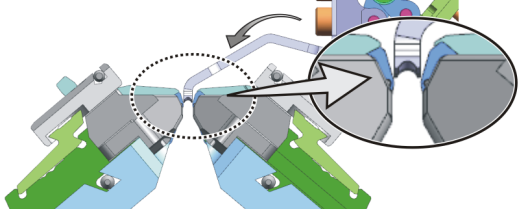
- 4
- Control the distance between the presser foot and the front needle bed with a feeler gauge, see Setting measurements for the presser foot.
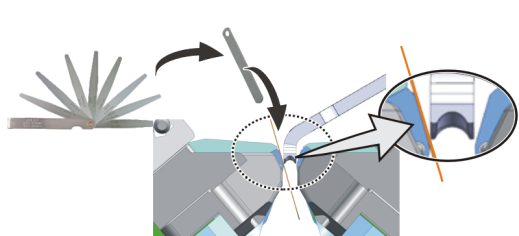
- 5
- If necessary, correct the distance. For this, use one of the shims from the accessories.
Shim 0,1 mm (ID 4170 276 043)
Shim 0,15 mm (ID 4170 276 044)
Shim 0,2 mm (ID 4170 276 045)
Remove the upper screw (1) and loosen the screw (2). With a pointy object (e.g. a knitter hook) you can remove or insert a shim.

Adjust the presser foot vertically
For doing this, proceed as follows:
- You are signed in as .
- 1
- Open the Presser Feet menu. Maintain Machine -> Service -> Presser Feet
- 2
- Switch power supply 40 Volts off (1).
- The motors of the presser feet are currentless - You can move the presser foot manually.
- 3
- Move the presser foot manually to the uppermost position.
- 4
- Determine the highest position (3) of the presser foot.
For this, slowly move the presser foot downward.
The movement of the presser foot is parabolic (2): The presser foot first moves a bit upwards and then downwards, until it reaches the undermost position (between the needle beds).
Repeat this movement several times, until you determine the highest point (3). 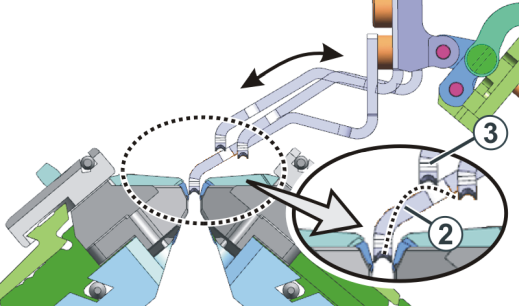
- 5
- Put the setting gauge (4) on the holding-down jacks and push it under the presser foot (5), see Setting measurements for the presser foot.
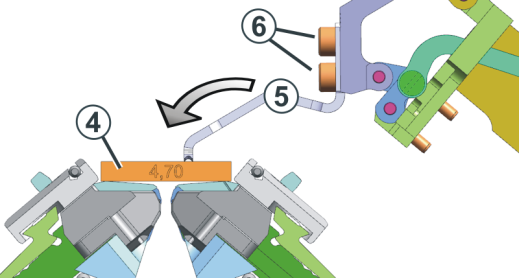
- 6
- The height is adjusted correctly when the presser foot touches the adjusting spacer.
 You can move the presser foot about 1 mm upwards or downwards.
 - 7
- If the height is not correct, loosen the screws (6) and push the presser foot into the right position. Retighten the screws and check the settings.