How to Restore the PPS and SKR3 or the SNS Database
The PPS Server Suite comes with a powerful live backup program, which allows you to recover a backup of any desired time, that was covered by the backup. A description about the boundary conditions can be found in the chapter System Recovery.
Before performing a backup, we recommend saving the backup of the current day in another folder, to be able to activate it also after several days, if necessary. If the live backup is still active some files are accessed by the backup service and cannot be copied. Deactivate shortly the backup (see How to Backup the PPS Database) to be able to save the files. After that you can activate the backup again or wait until the recovery of a backup is finished.
How to Restore a Backup of the PPS and SKR3 Database:
- The backup of the database exists.
- 1
- Start the data Backup program as it is described here:
How to Restore the PPS and SKR3 or the SNS Database - 2
- Switch to the Restore backup tab.
- 3
- Check the path in and correct the path, if it is not matching the desired Backup.
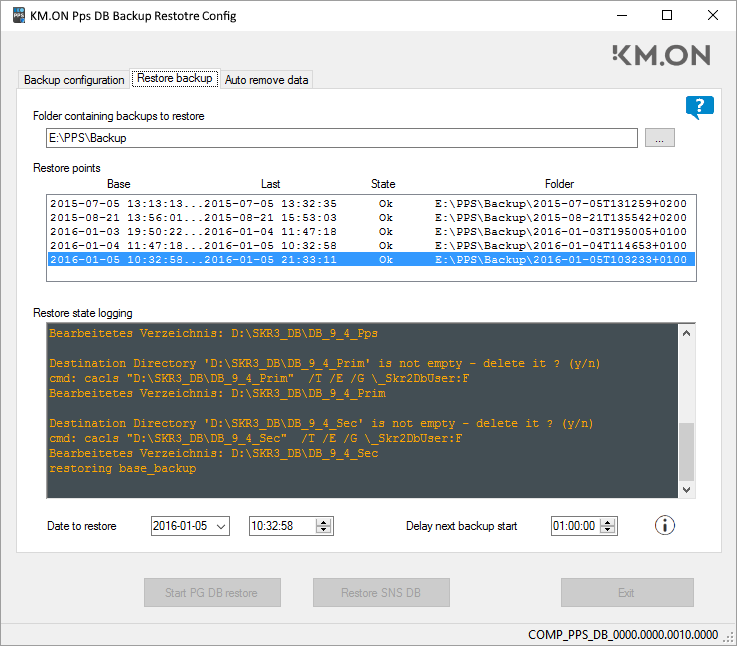
- In the Restore Points window are listed all available backups now.
The Base column displays the time, when the backup started. This backup is generated as memory dump.
Only at this moment, the SNS database is backed up as well.
The column displays the last time that was recorded in the Backup. The data that are recorded after the Base-Backup time are backed-up incrementally in form of individual SQL commands. - 4
- Click on the desired Backup of the list.
- In the field is entered the Base time now.
- Backups at the base time are the ones that can be recovered the fastest. If you are flexible with the time, it is better to select the base time of the next day instead of the last moment of a day for example.
- 5
- If you click again on the Backup, in the field the Last time is entered now. This is the last possible recovery moment for this Backup.
- 6
- In the field you can also enter any desired point of time from the available Backups. The software then automatically selects the appropriate Backup.
- 7
- In the field you can enter the time, when you want to start the next Backup in a delayed way after the Restore. This delay allows you to subsequently recover other points in time that you prefer. In case that the next Backup would be generated immediately after the Restore, the oldest Backup would be replaced and if you execute it multiple times you could loose all Backups in the worst case.
- The presettings are now finished and the current backup is saved in another folder. You can start the backup.
- 8
- Click on Start PG DB restore to begin with the recovery.

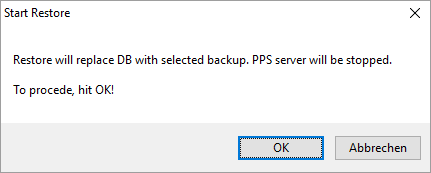
- The program will carry out one safety prompt before starting the recovery.
- 9
- Confirm with OK.
- 10
- If an error message appears with the message, notifying that it was not possible to stop the PPS server, it needs more time to stop.
Try it again after approx. 5 minutes. - You can see the progress of recovery and remarkable incidents in the output window in orange font color. For large recoveries you must schedule sufficient time, may be several hours.


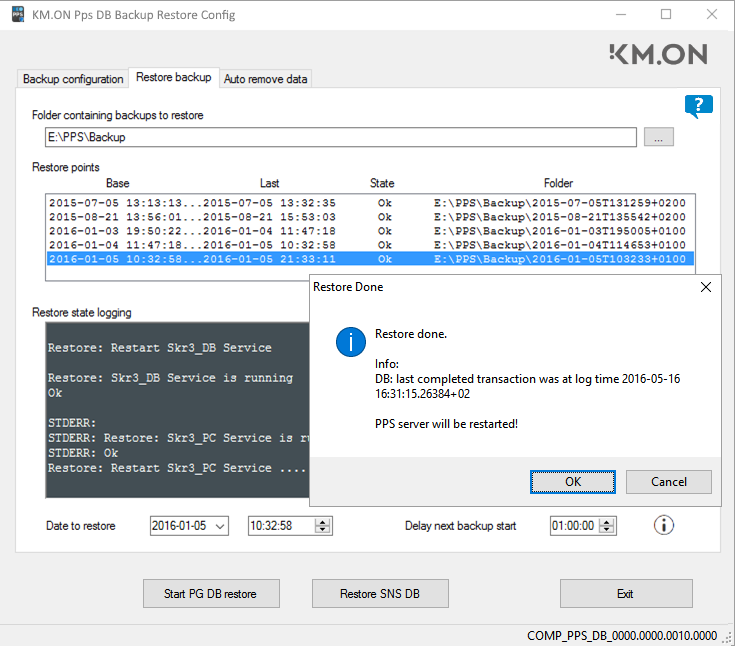
- If the recovery was carried out successfully you receive the corresponding message and the font color in the returns to white.
- 11
- Confirm the dialog with OK, to restart the PPS server then.
- After the usual waiting time, the PPS Web site will again be accessible.
The way to proceed will depend on the desired task.
If the PPS installation must be adapted:
This can be necessary if you recover a state that is incompatible with the current PPS installation.
- You only wanted to correct damaged data, but keep working with the current PPS software.
- You returned the database to the previous status.
- The Restore Done dialog is still visible.
- 1
- Select Cancel if the PPS installation must be adapted.
- 2
- In this case go to Updating the PPS Server Suite and carry out the described update with the necessary version.
- The database will then be adapted in a way that the PPS Server Suite will be again capable of running.
- 3
- Select the option s to start the PPS again after the update.
- After the usual waiting time, the PPS Web site will again be accessible.
If the PPS software must be reset:
This option is possible only to a limited extent using the procedure described below and depends on the number and type of changes that took place between both states. In the worst case a clean installation and an update of the PPS up to the needed state will be necessary. Ask the Stoll Support about the options, if necessary.
- You want to return to an older state of the PPS Server Suite.
- You returned the database to a state which still worked with the needed PPS Server Suite.
- The Restore Done dialog is still visible.
- 1
- Select Cancel to reset the PPS Server Suite.
- 2
- Go to the D:\PPS\PpsJBossServer\PpsServerInstallScripts\PpsLast\ PpsSwUsedTill_* directory and find the folder with the date, when the undesired installation was executed for the first time. The folder contains the replaced files that you need.
- 3
- In the D:\PPS\PpsJBossServer\standalone\deployments directory replace the *.ear and *.war files and copy them from the \PpsSwUsedTill_* directory, if available.
- 4
- Start the Windows service manager.
- 5
- Start the StollPpsServer service
- After the usual waiting time, the PPS Web site will again be accessible.
How to Restore the SNS Database:
- The backup of the database exists.
- You selected a Base backup moment as described under "How to Restore a Backup of the PPS and SKR3 Database". The time makes no difference, as only one deduction per day is secured.
- 1
- Click on Restore SNS DB to begin with the recovery.

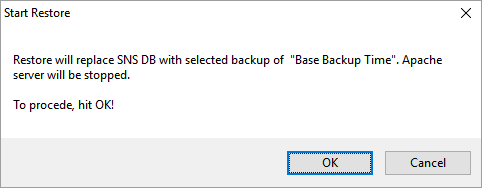
- The program will carry out one safety prompt before starting the recovery.
- 2
- Confirm with OK.
- In the window you can see that the server SNS has been stopped, the database created, and the server SNS restarted.
- The SNS database was returned to the selected Base Backup moment.